
Evaluating ARMember for an Author Subscription Platform on WordPress
With the increase in authors interested in starting subscriptions for their brand, many are turning to platforms such as Patreon, Substack, Laterpress, and Ream. However, website-based subscriptions do not rely on the whims of platforms, so I felt it was worth evaluating this as an option.
In this post, I’ll be discussing only WordPress-based subscription options because that’s the CMS my website runs on, and I’ll be focusing on ARMember, for reasons I’ll outline below. I previously did a deep dive into Paid Membership Pro, which you can see here. I did an overview of several less-known membership plugins in this post if you’re interested.
ARMember meets all of my criteria for a membership plugin AND its paid option is only $69-79 lifetime (includes only 6 months of support, I noticed).
Setup
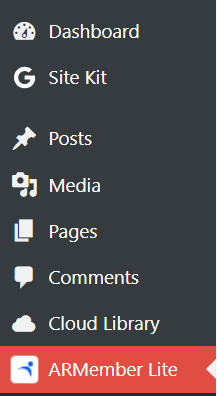
You can easily install the free version through the Add Plugin section of WordPress. Once installed and activated, it creates a new section in the admin menu:
Membership Levels
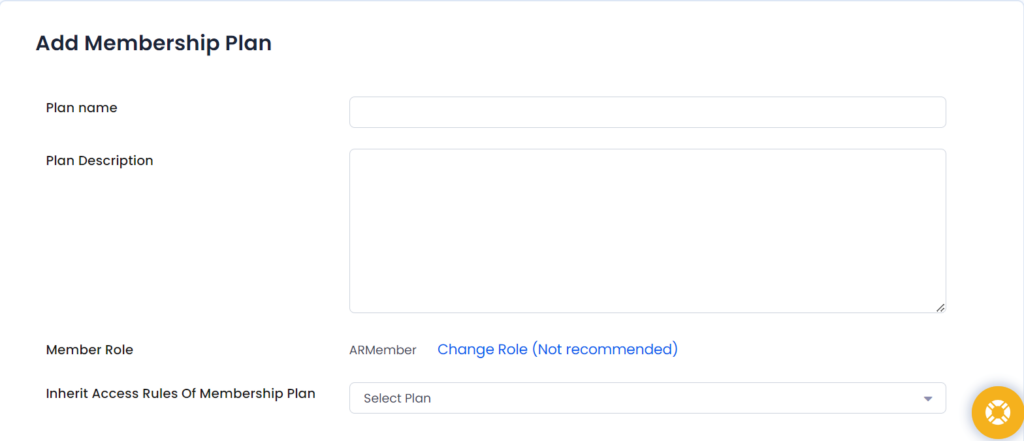
To set up a new member level, navigate to ARMember Lite > Manage Plans. Then click “Add New Plan”. You can create per-tier WordPress roles if you want, but I’ve kept it as the default. You can also allow this level to inherit the access rules of another level, which is great if you want each level to be cumulative.
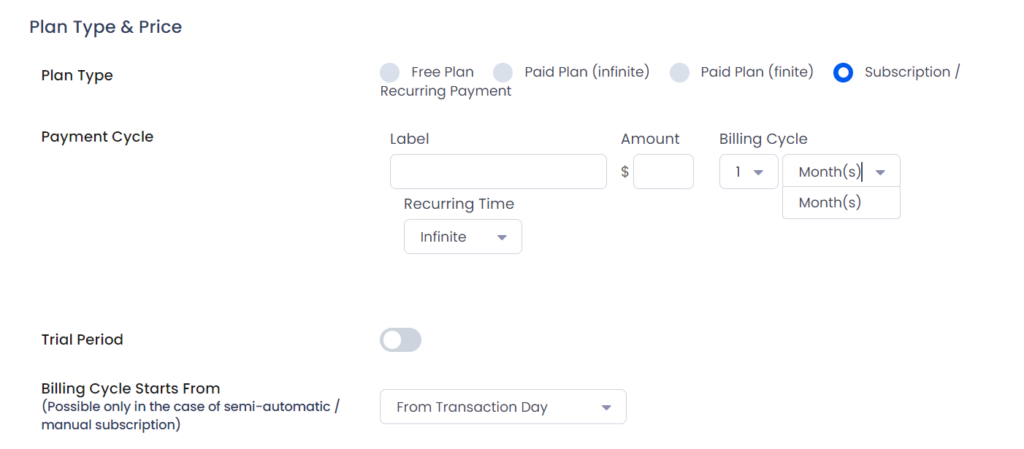
You can set up each level as free or paid. And there are different options for different types of payment, but we’re going to stick with Subscription. You can choose the amount and billing cycle.
ARMember also allows you to set up a trial period, which then prompts you to set the price and duration of the trial period.
Next, it allows you to select the billing cycle start date. You can choose “From Transaction Day” or set it for a specific day of the month.
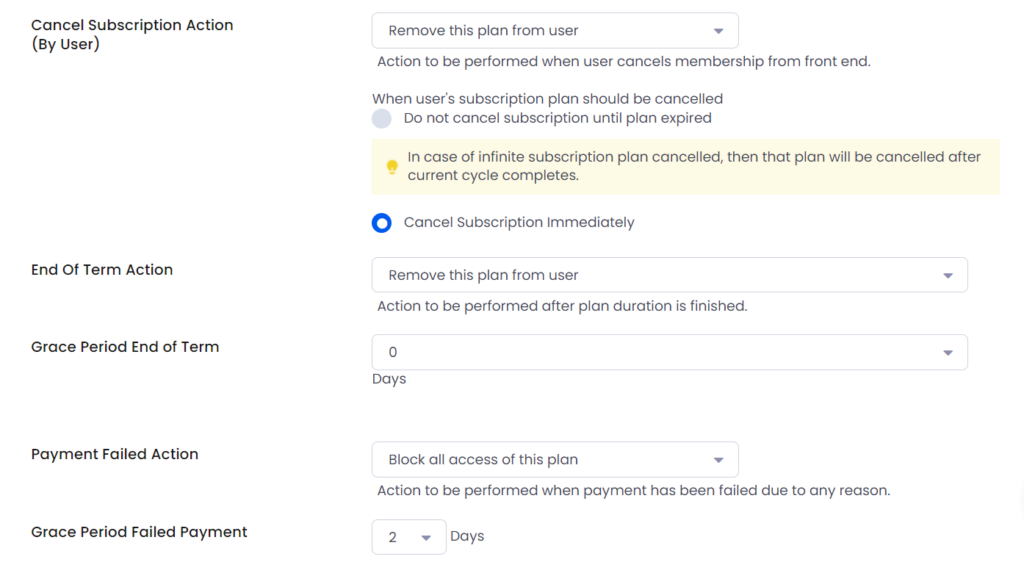
There are options for what to do when the subscription is cancelled. I’ve selected “Give access to Free Tier” to encourage users to stick around as followers (and perhaps re-subscribe at a future date).
I also like that I can choose to not cancel the subscription until their plan expires (instead of immediately).
For End of Term Action and Failed Paid Action, I also chose “Give access to free tier”, for the same reasons as above.
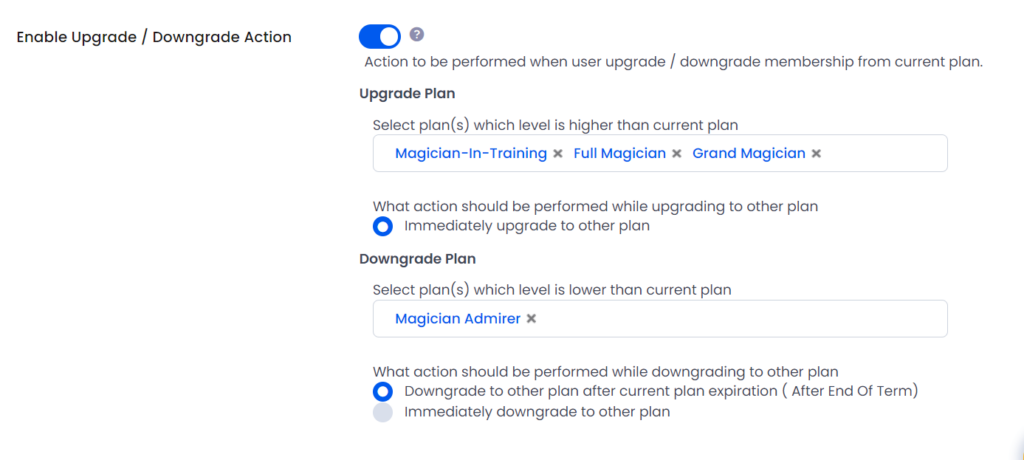
You can also set up upgrades and downgrades, which I love! Because I always want it to be easy for subscribers to upgrade or downgrade without having to cancel and resubscribe.
Signup Page
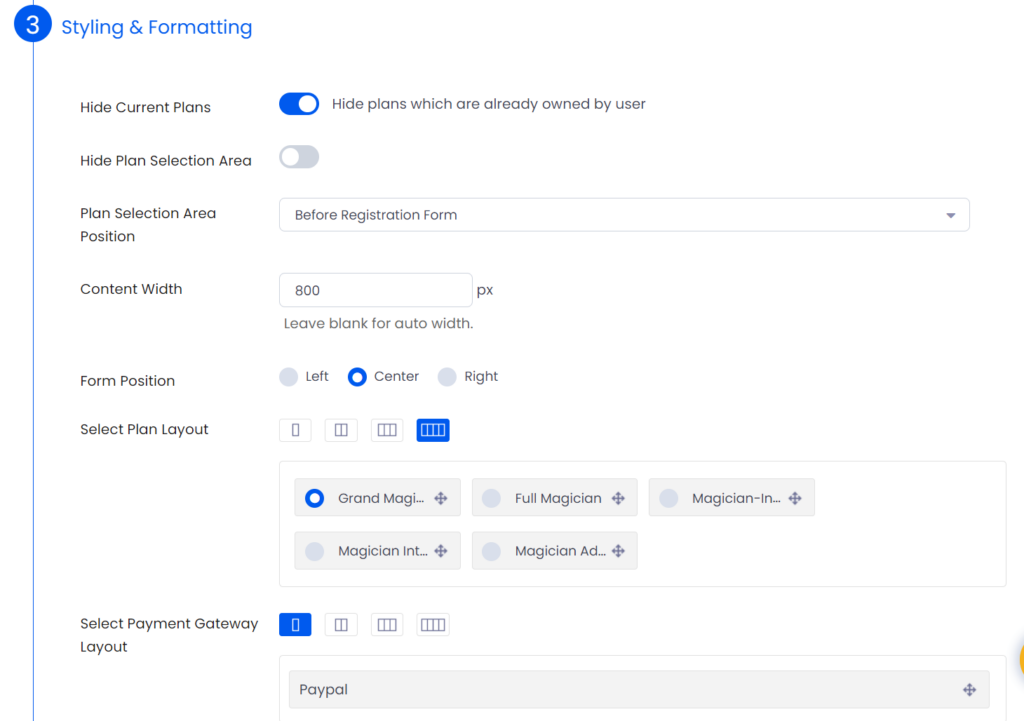
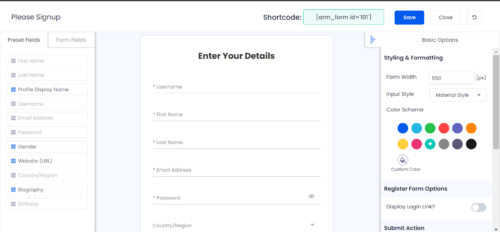
One slightly frustrating thing about this plugin is that you have to use their signup shortcode. It’s somewhat customizable, but not to the level I’d prefer.
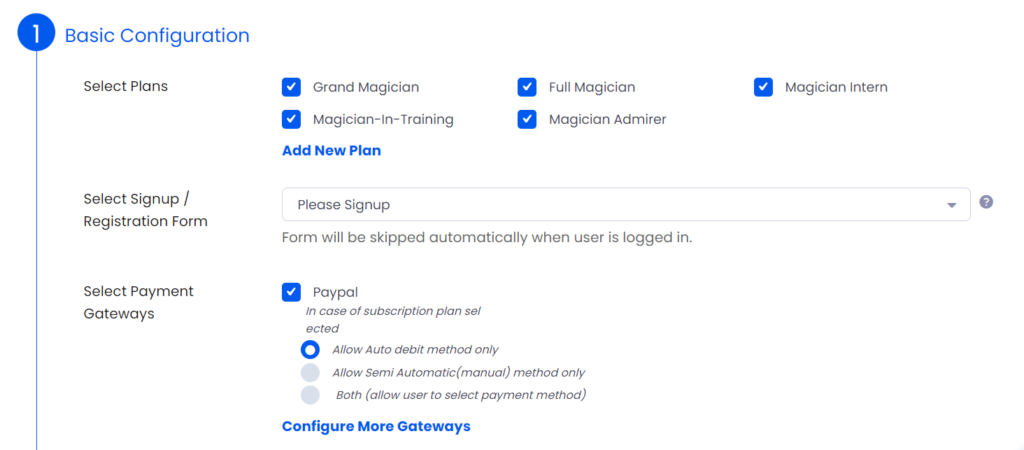
First is the basic configuration, where you select the levels, form, and payment gateways you want to include. Paypal is the only available option on the free plan. Frustratingly, there’s no “Testing” payment gateway to let you play around without setting up a payment gateway. But you can use Paypal’s testing API to run everything in sandbox mode.
You can then label
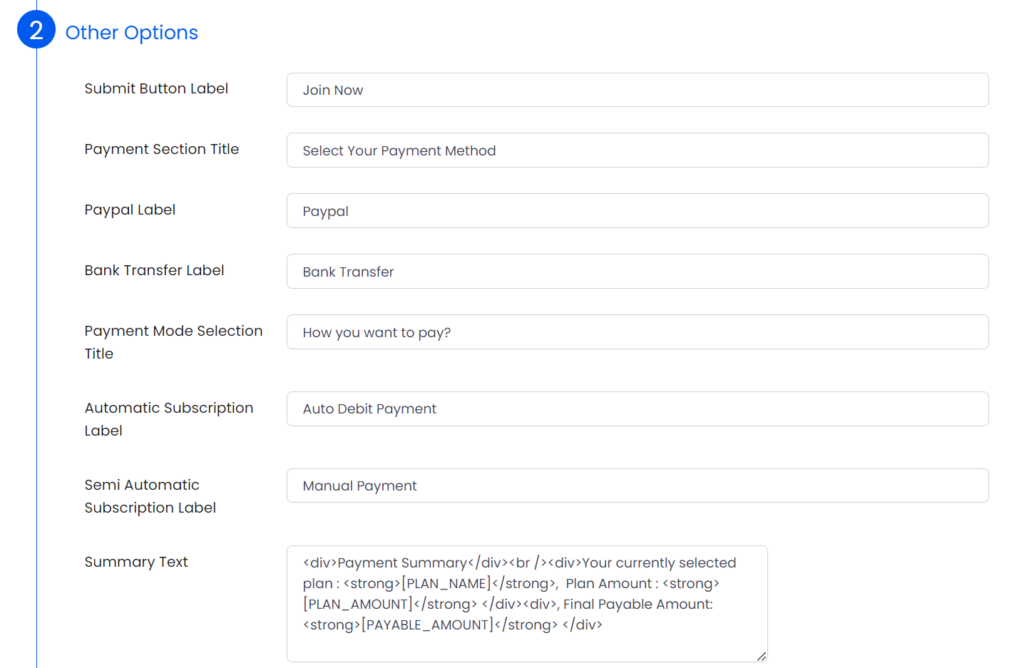
test
I’ve set up tabs on my signup page to separate Monthly and Annual plans. I’ve found that it’s a little confusing to select the plans if they have the same name (because I want the Grand Magician Monthly plan and the Grand Magician Annual plan to have the same name, but show up in different tabs), but I figured it out.
Membership Pages
By default, ARMember can create the following pages for you: Registration, Login, Forgot Password, Change Password, Edit Profile.
I found that I needed to add a My Profile page to show the user (1) their profile details and (2) their membership details. I also added buttons to upgrade/downgrade their plan, to logout, and to close their account. I was able to use ARMember’s shortcode generator Gutenberg block to achieve this with little effort.
Payments
So far, I have only set up sandbox payments on Paypal. ARMember’s documentation on this isn’t great, and neither is Paypal’s. So, if you haven’t done this before, here are some tips.
To setup a sandbox account, you’ll need to login to your Paypal account, then head over to this link. I had mixed success with getting the Developer Dashboard to load, and ended up having to clear my cache and/or log into an Incognito window to get it to work.
Once there, go to Testing Tools > Sandbox accounts. You should have 2 accounts there, a Business account and a Personal account. If not, you can click Create Account to make them. And you’ll need both. Once you have the accounts, click the 3 dots next to the business account and View/Edit account.
Now, go to the Payment Gateway settings of the ARMember plugin.
For Merchant Email, use the Email address in the LOGIN INFO settings of the Sandbox Business account. For the API details, scroll down the Sandbox Business account page until you see the NVP/SOAP Sandbox API credentials. Copy/paste those into the ARMember Payment Gateway settings.
Then click Save!
Now, when you are ready to test a transaction, you can progress through the website UI until it redirects you to Paypal. Then you’ll View/Edit the PERSONAL Sandbox account in Paypal, and use the Email and Password provided in the LOGIN INFO section to complete the transaction.
Once I figured all of this out, testing signup, upgrading, and downgrading was straightforward.
Discount Codes
The free version of ARMember does not allow you to use coupon codes. However, the coupon code module comes with the lifetime paid plan. If I decide to go with ARMember, I’ll return and add some information about that here.
Email Templates
ARMember has the following email templates for you to customize:
- Signup Completed Notification To Admin
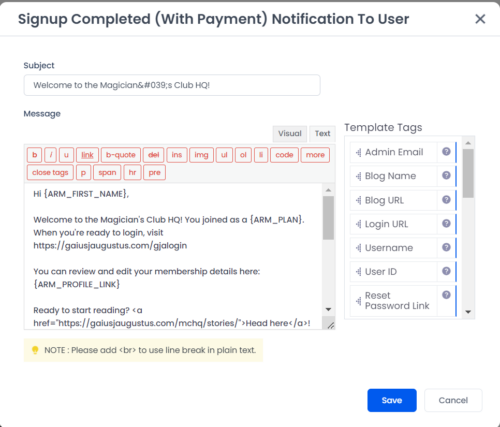
- Signup Completed (With Payment) Notification To User
- Signup Completed (Without Payment) Notification To User
- Change Password
- Forgot Password
- Profile Updated
- Profile Updated Notification To Admin
- Grace Period For Failed Payment
- User Enters Grace Period Notification
- Failed Payment Notification To Admin
- Manual User Activation
The user interface for drafting the emails is very nice, and there are plenty of shortcodes available to add necessary information dynamically.
User Fields
The free version of ARMember allows you to add your own fields for user signup. For starters, I chose to add Date of Birth (for future birthday rewards) and Region/Country (for tax purposes). It’s a relatively nice interface, though there isn’t a lot of customization available for look and feel. Still, it’s clean and easy to use.
You can also modify the login, change password, and forgot password forms as well. I just changed the button color to harmonize across the site.
What’s Missing?
So, all in all, I’m very happy with the free version of ARMember so far and the cost to upgrade is very reasonable. It has many of the features I wanted, and the setup was straightforward and pretty quick.
But what’s missing?
Well, there are a few features missing in ARMember. Read more about how I’m handling these features in this article.
- Inline Comments
- Flexible Reading Experience
- Disabling Select Text
- Navigating Between Chapters
- Notifying Users of New Posts
- Tracking Reading Progress & Bookmarks
- Glossary
Custom Pages
Additionally, there are also some pages missing, like a “Stories” page with a link to all of my work. But that’s a problem with a straightforward answer because it’s built in to WordPress.
That’s it. I think that ARMember is a great option for authors new to subscriptions, and the paid version is very affordable compared to other options (currently $69-79 lifetime with 6 months of support). The gaps are pretty manageable, too. Of course, if you choose this route, you don’t have the benefit of discoverability that platforms provide, and you’re responsible for all maintenance and customer support. But I’m happy to know there’s a viable alternative that puts all the data and power in my hands.