Understanding the Adobe Illustrator Interface
Disclosure: Some of the links below are affiliate links, meaning, at no cost to you, I will earn a commission if you click through and make a purchase. Recommended products are always ones that I have tried myself and personally recommend.
Ready to start learning Adobe Illustrator? Often, those who I help with Illustrator are intimidated by the interface, so before we get started drawing, I want to introduce you to the two most important parts of the interface.
Don’t forget to get your downloadable “Adobe Illustrator Interface” worksheet at the end of this post.

Opening Adobe Illustrator Interface
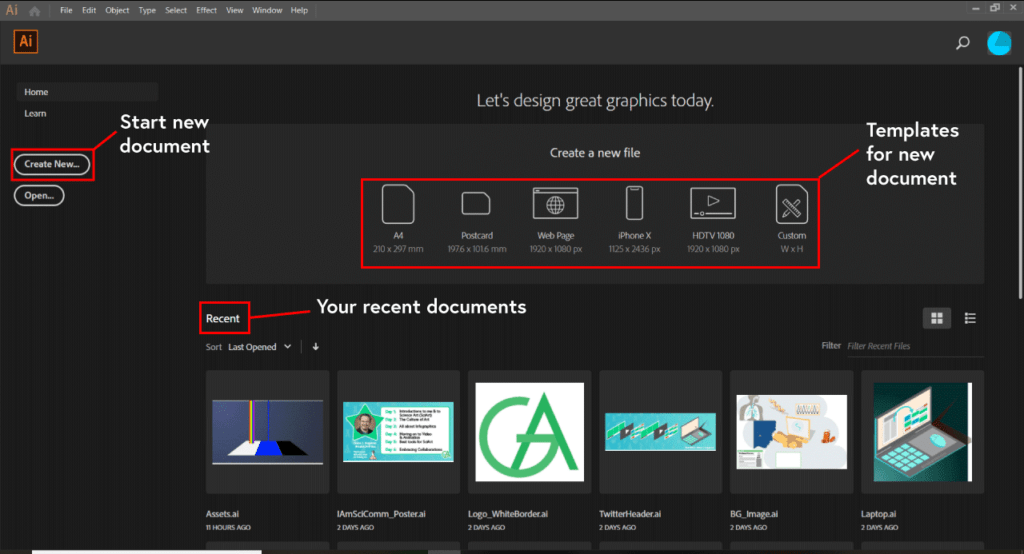
When you first open Adobe Illustrator, you’ll come to a welcome screen. This screen has several useful things for you: easy access to recent documents, templates for projects, and quick links to open or create a new document.
Let’s go ahead and click Create New… on the left.
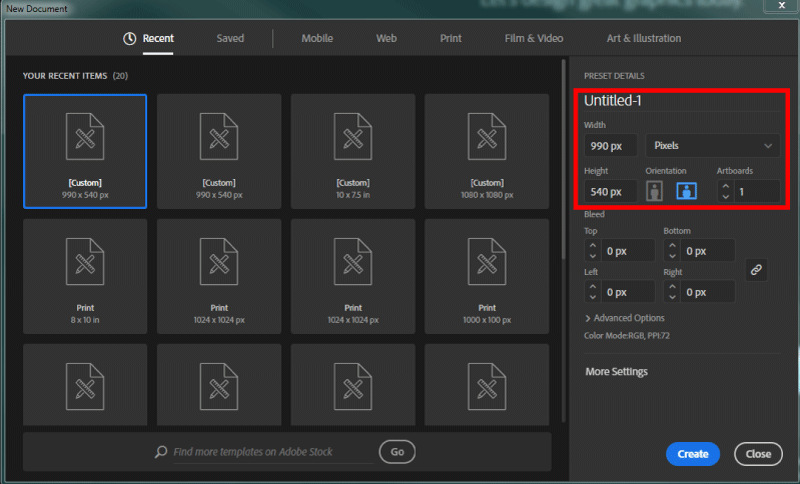
The New Document screen will come up. You’ll get used to this screen quickly. It
For now, let’s just focus on starting a new document. The main field you should worry about for now are the Width and Height of your document. Here, I chose a width of 990 px and a height of 540 px, but it doesn’t really matter.
Not only should you choose the size appropriate for your project, but you can always change this later.
We’ll be talking about Artboards in a later tutorial, but for now, just know that this will allow you to draw multiple images on the same document.
Now, your interface will likely look a little different than mine. You can customize your interface as you become more comfortable with your personal workflow. I love how customizable Illustrator is, and am always looking to make my process more streamlined. The less time I’m looking around for the right thing, the more time I can spend creating!
Here’s my interface when I first open Illustrator. Again, it’ll look different from yours, but don’t worry too much about that right now.
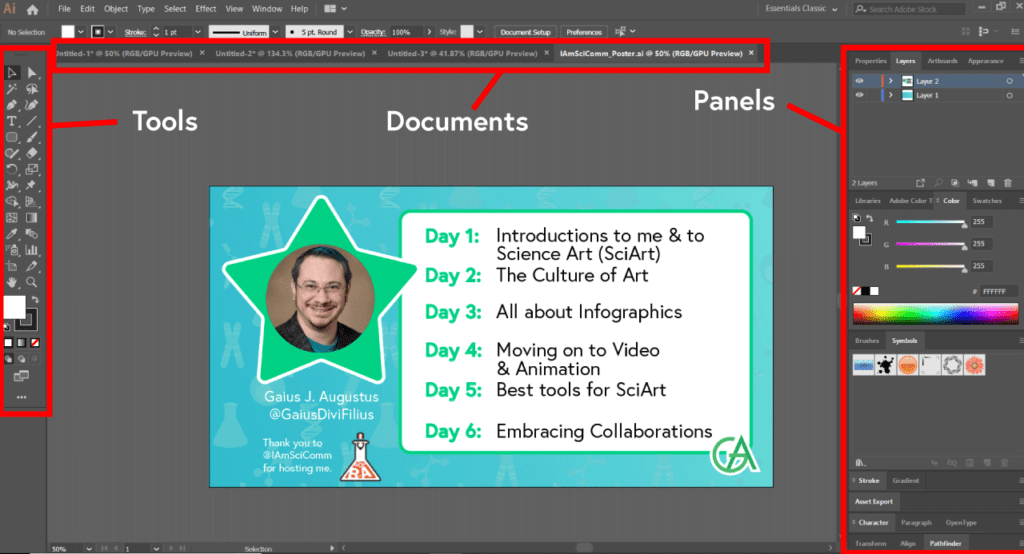
Tools Interface
On the left side of the screen, you’ll find the tools bar. I separate the tools into a few types:
In future tutorials, we’ll be going through all of these tools in depth, so for now, just know that they are here and that they live on the left side of your screen.
Panels
On the right side of your screen are the panels. Panels extend functionality and add options to your workflow. If you want to see a list of all the panels, go into the Window menu (menu at the very top of the program). Again, in future tutorials, you’ll get experience with these panels. For now, I’ll just introduce you to the four that I use most often.
Again, panels live on the right side of your screen.
Just knowing these two simple things should make the entire interface a bit more comfortable for you. And with that, you can start drawing!
Get the worksheet with all the tips for upcoming tutorials